Step 2: UV Setup

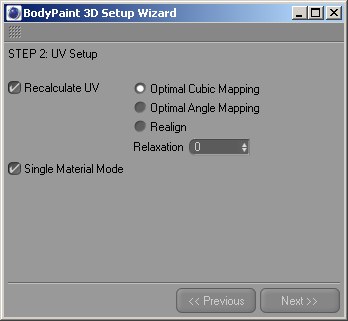
In Step 2, you choose how the UV mesh should be recalculated (if at all). You can also choose whether the objects or materials should share the same texture or each be assigned their own separate texture.
Disable this option if the objects already have UVs suitable for painting. Otherwise leave the option enabled and the Paint Setup Wizard will optimize the UVs.
Optimal Cubic Mapping
Optimal Angle Mapping
Realign
Relaxation
These four algorithms enable you to choose how the UV mesh will be optimized. They will only have an effect if Recalculate UV is enabled. These algorithms are also available in the UV Mapping manager, where they are called: Optimal (Cubic), Optimal (Angle), Realign and Relaxation Steps. See UV Edit Menu, for details on these algorithms.
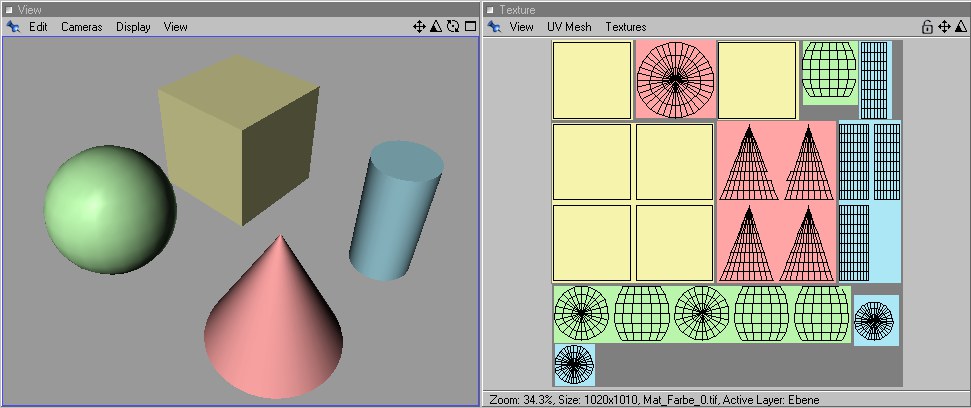
 Single Material Mode was enabled to share one material between four objects.
Enable this option if you want the objects to share the same material. This is especially useful if you are designing characters for games where you need to be as efficient as you possibly can with the textures. Each object will be assigned its own UV mesh and portion of the texture. You will still be able to paint the objects separately even though they share the same material (see the picture above).
If on the other hand you want a separate material assigned to each object, disable the option. The materials and textures will be named according to the names of the objects.
Click Previous to go back to Step 1 or click Next to proceed to Step 3.