Step 3: Material Options

In this third and final step, you choose
- which channels you are going to paint on
- their initial fill colors
- and which textures should be scaled (if any).
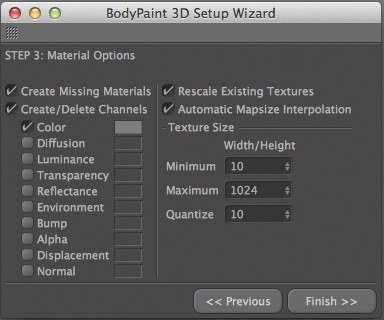
If this option is enabled, the Paint Setup Wizard will create a new material for each object you selected in Step 1 which does not have a material yet. If the option is disabled, no new materials will be created and the setup will affect existing materials only.
Enable this option if you want new textures to be created or existing textures to be deleted or both. Choose the desired channels from the Channels list below. You can choose a background color for each channel using the color boxes. Click a color box to open your computer system’s color chooser.
Below the Create/Delete Channels option, you will see a list of material channels displayed. These represent each material channel which may contain a texture. Enable the channels that you want to paint on and ensure that all other channels are disabled. The more channels you enable, the more RAM is required. Therefore you should only enable the channels that you actually want to paint on. If you change your mind later on, you can, after all, add the new textures in seconds.
The channels list also supports the tri-state status (horizontal line in the Options field):
If you see this icon appear, it means textures exist in some channels but not in others. Click the tri-state icon to set them all to the same state.
If you want existing textures to be resized, enable this option and use the Texture Size settings to specify the new size.
Automatic Mapsize Interpolation
BodyPaint 3D can intelligently choose the size of the textures for you within the limits defined by Minimum and Maximum.
Suppose you want to paint on a model which is made up of 24 objects, where each object is a different size. If the textures for these objects were all the same size, chances are you would run into problems when you paint, even if using projection painting.

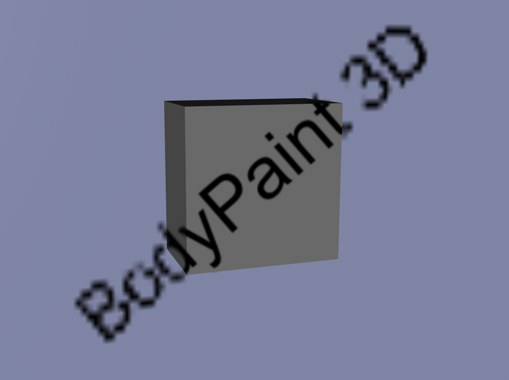
For example, we created two cubes as show above: a small cube and a much larger cube. In the picture, the blue area is part of the large cube’s front face.
The small cube is ten times smaller than the large one. Even though we have used projection painting mode, the end result is poor because the blue texture is too small relative to the texture for the small cube.
This is where Automatic Mapsize Interpolation comes in. It intelligently chooses the size of the textures for you taking into account the size of the objects relative to each other.
You can define the minimum and maximum size for the textures using Minimum and Maximum. Minimum specifies the texture size for the smallest objects, Maximum does the same but for the largest objects.
The Quantize value gives you a further way to control the size of textures. It defines a step size. In other words, the width and height of each texture will be a multiple of the Quantize value. For example, if Quantize is set to 100, you will get a texture size of 200x300 instead of, say, 213x323. Or 800x600 instead of 817x643, and so on.
If you want the textures all to be the same fixed size, disable Automatic Mapsize Interpolation and enter the desired width and height in pixels into the Width and Height text boxes.
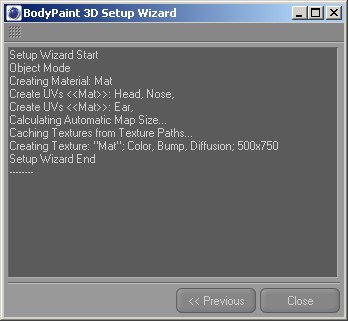
Click Previous to go back to Step 2 or click Finish to complete the setup. After clicking Finish, you will see the following dialog appear. This tells you the steps the wizard has taken in order to prepare the objects for painting.

The dialog is no-modal so you can keep it open if you wish — you can even click the Previous button to go back to Step 3 and change the setup.
Selecting Finish will create all necessary textures and materials
You are now ready to paint your objects, but first we recommend you save the scene and materials using File / Save Project with Assets from the main menu.