Tools Menu
All of the commands described here pertain to the active Sculpt object. If multiple Sculpt objects are selected, the top-most object in the Object Manager will be affected.
Creates a normal polygon copy (without a Sculpting tag) of the Sculpt object with its current subdivision level. This copy can, for example, be painted on using the tools in BodyPaint 3D.
See also Create Polygon Copy above. This command, however, a separate polygon object for each subdivision level. The polygon objects will be positioned evenly along the global X axis.
The objects at their various levels of subdivision can be used for various purposes, e.g., for export to third-party applications.
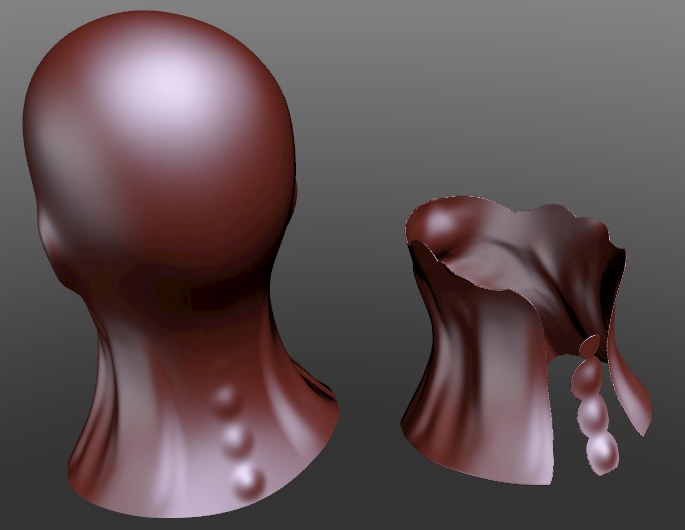 The structures on the throat and neck were created on a Layer which was extracted using the Extract Object From Layer command.
It can sometimes be useful to extract parts of a Sculpt object so they can be edited separately. Articles of clothing, for example, can be sculpted directly on a character and subsequently extracted for editing. Extraction can be done using one of the following commands:
- Extract Object From Layer: Makes a separate object using the content of a given Layer not equal to 0, i.e., that which was sculpted.
- Extract Object From Mask: A separate object will be created from the masked part of a Layer. The extraction process extrudes the surface and gives the extruded surface a specified thickness.
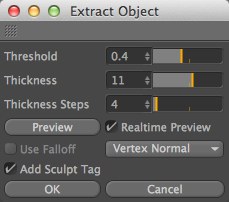
Both commands share following dialog window:
 The conus at the left with increasing Threshold values.
The Threshold value (which works the same with masks) defines the size of the region to be extruded. For Layers, the subdivision for that Layer will be used; for masks, the degree of masking will be used (mask with gradients contains various shades of gray).
When using a low Threshold value, only a minimal amount of strength must be applied to extrude these regions; a large Threshold value requires a correspondingly larger amount of strength. In short: The larger the value the smaller the extruded region will be.
If Real-time Preview is enabled, this function can be adjusted interactively.
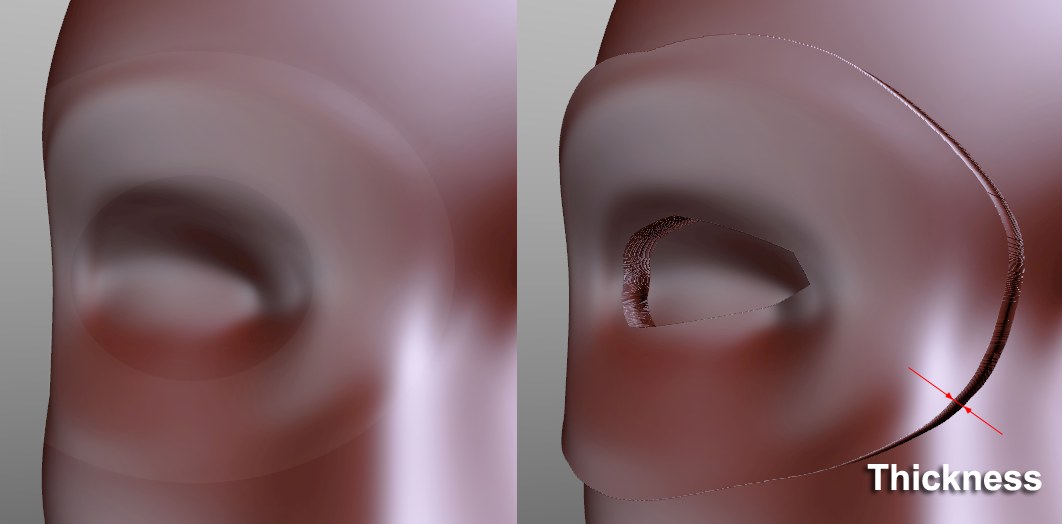
The Thickness value defines the height of the extrusion. In the image above, the Wax brush was used to sculpt the area around the eye on a separate Layer. The result shown was achieved by applying the Extract From Layer command with a larger Thickness value. The Thickness Steps value subdivides the extruded surface along the extrusion (this is necessary if you want to create extruded shapes on the side surfaces). If Thickness is set to 0, only a one-sided, caps’ surface will be created.
If Real-time Preview is enabled, the first three changes can be seen in real-time in the Viewport. This can, however, take quite a bit longer if a very high subdivision is used. In this case, disable this option and click on the Preview button to make changes manually.
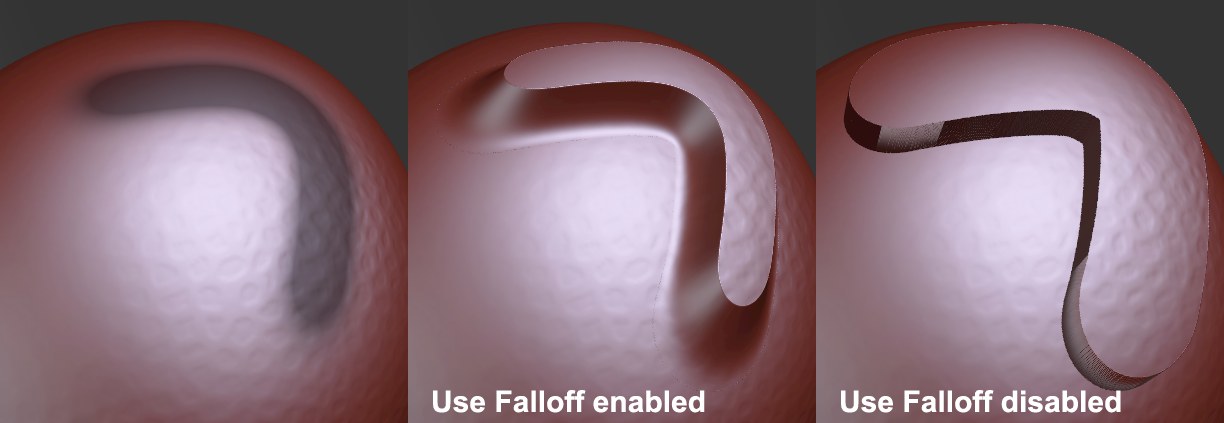
This option is only designe for use with the Extract Object From Mask command. If you have a mask with gradients, enabling this option will create a soft extrusion instead of extruding perpendicular from the surface (option disabled).
Use the drop-down menu to the right of this option to define how Cinema 4D determines the direction in which to extrude:
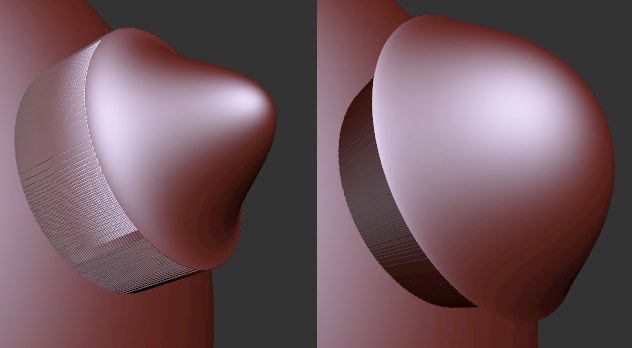 Left: Average Normal, right: Vertex Normal.
- Vertex Normal: Each vertex point will be extruded in the direction of its vertex Normals. Larger values can easily result in balloon-like intersections because the surfaces will practically inflate.
- Average Normal: All vertex points will be extruded in a direction that corresponds to the calculated average of all vertex Normals. The surface will remain unchanged when made thicker.
If enabled, the new object will be assigned a Sculpt tag so you can continue to sculpt without interruption. The Sculpt tag will have a default subdivision value of 0.
In addition to the know functionality for editing PoseMorph targets with Sculpt brushes, this function can be used to create a subdivided object with a PoseMorph tag from a Sculpt object.
A separate PoseMorph target will be created from each Sculpt layer of the current subdivision.
This function serves as a workflow assistant. All PoseMorph targets can be created directly within the Sculpt function and then edited as a PoseMorph object in a single step.
This function greatly reduces the number of steps that would otherwise be needed (i.e., creating copies in the PoseMorph tag)