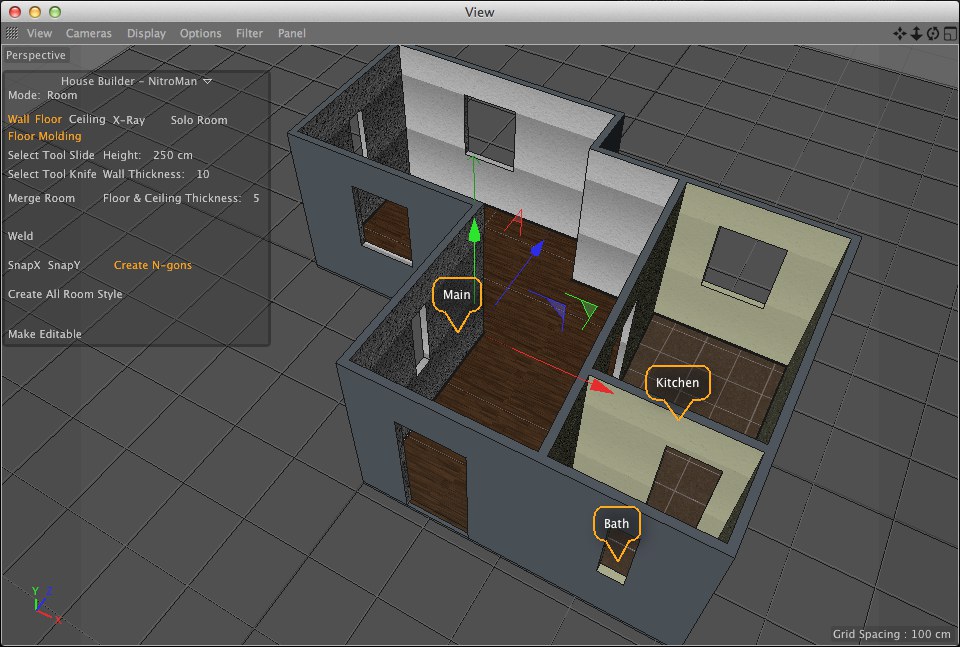
House Builder
The House Builder preset in the Cinema 4D Content Browser lets you easily create custom house models. The preset can be found in the Content Browser under Presets / Tools & Helpers / House Builder.
Double-click on the House Bilder icon to open the preset in Cinema 4D. In the Object Manager you will find a simple default basic house made up of a square foundation and four walls.
You can click on the Annotation tags to open a brief documentation for the House Builder preset.
House Builder menu vs. Attribute Manager
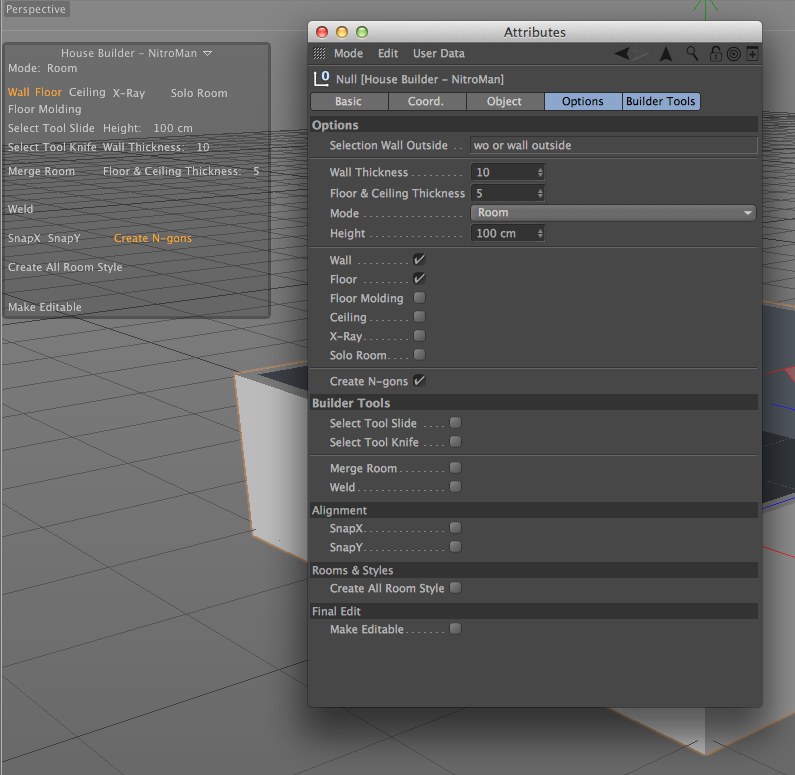
In the Viewport you will see the House Builder HUD menu, which contains numerous settings to help you build your house. This menu can be minimized by clicking on the small triangle at the top of the HUD. If House Builder is selected in the Object Manager, the HUD will automatically appear. When the House Builder object is deselected in the Object Manager the HUD will no longer be displayed. All HUD settings are also available in the Attribute Manager.
You can use either menu when building your house. However, some functions such as the Select Slide Tool, SnapX / SnapY and Solo Room tools are easier to use in the HUD since using them in the Attribute Manager will cause the relevant Child objects to be deselected. This is why the documentation will concentrate on working with the HUD.
The Mode setting offers the following options:
- Blueprint: The house will be displayed as a 2D floor plan with wall thickness
- Mesh: Only the base polygon surface will be displayed
- Room: The complete house will be displayed, including walls
Additional options are also available that affect the visibility of various elements such as Wall, Floor, Floor Molding and Ceiling. In addition, the X-Ray option offers a semi-transparent display of all visible elements. The Solo Room command will be explained later.
The Create N-gons command is designed for use with complex geometry. Disable this option if the house’s geometry becomes so complex that geometry penetrates other surfaces.
The floor plan of the house is always based on the shape of the polygon outline used as a basis. In the example Project, this is the object named Plane in the Object Manager below the House Builder - NitroMan Python generator object.
Of course you can give your house any type of floor plan you like. To do so, delete the square polygon object and use the PolyPen tool to draw a new floor plan. Then make the polygon you drew a Child object of the House Builderobject. After the floor plan has been created you can continue to modify it in Use Point or Use Edge mode.
The SnapX and SnapY options can be used to help snap points to the correct locations. To do so, select at least two points and click on SnapX (horizontal) or SnapY (vertical) to define the axis on which the points should be aligned.
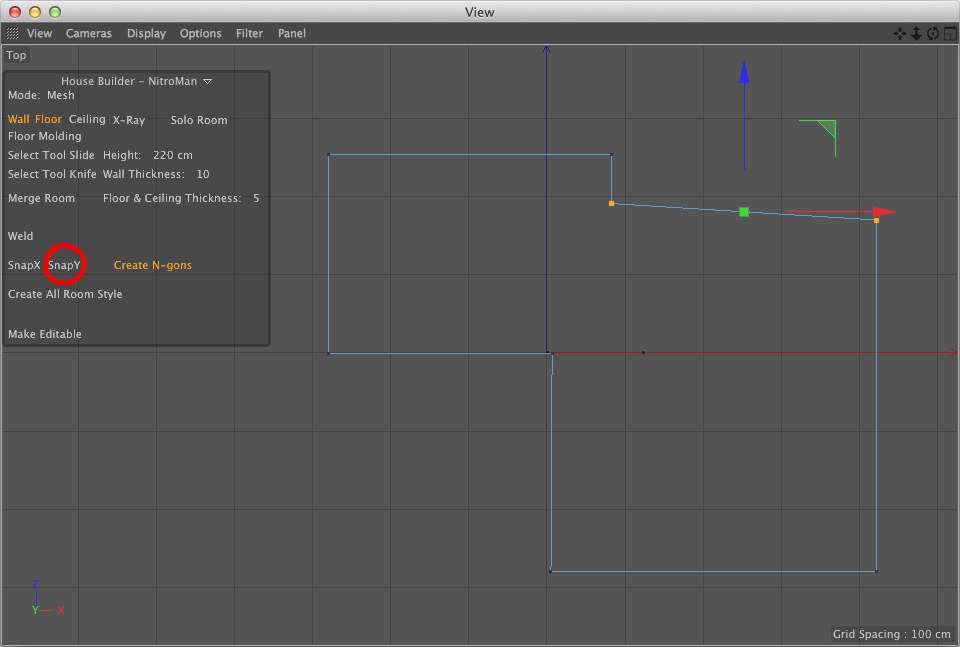
The Weld option can be used to weld multiple points into a single point.
After creating the floor plan you can continue with creating the walls. To do so, select the floor plan object in the Object Manager and enable Select Tool Knife in the Attribute Manager. This activates the Cinema 4D Line Cut tool, which you can use to make cuts in the polygon surface that will automatically be displayed as walls with the corresponding thickness.
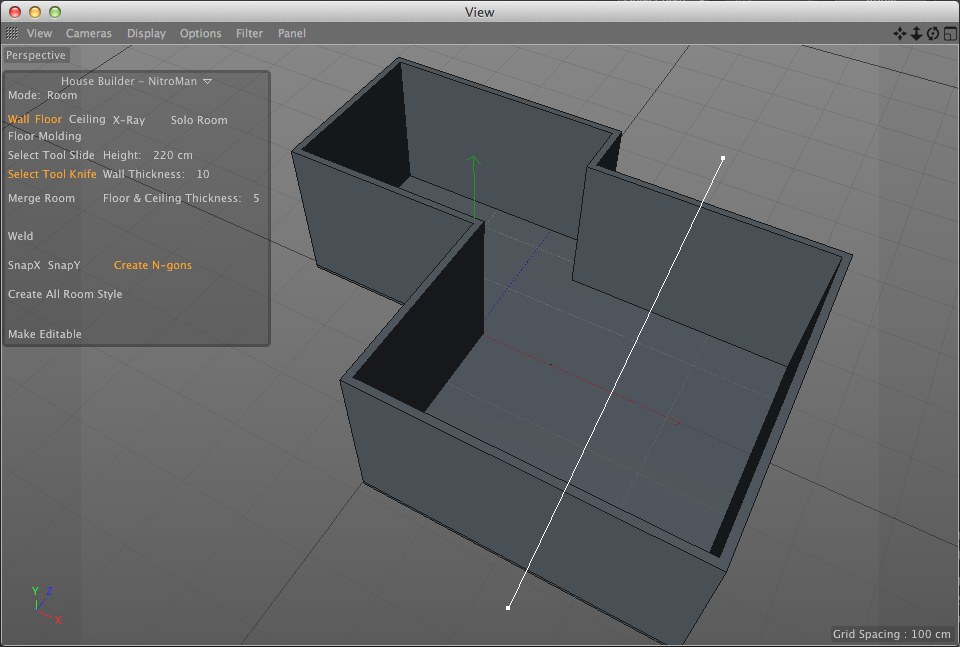
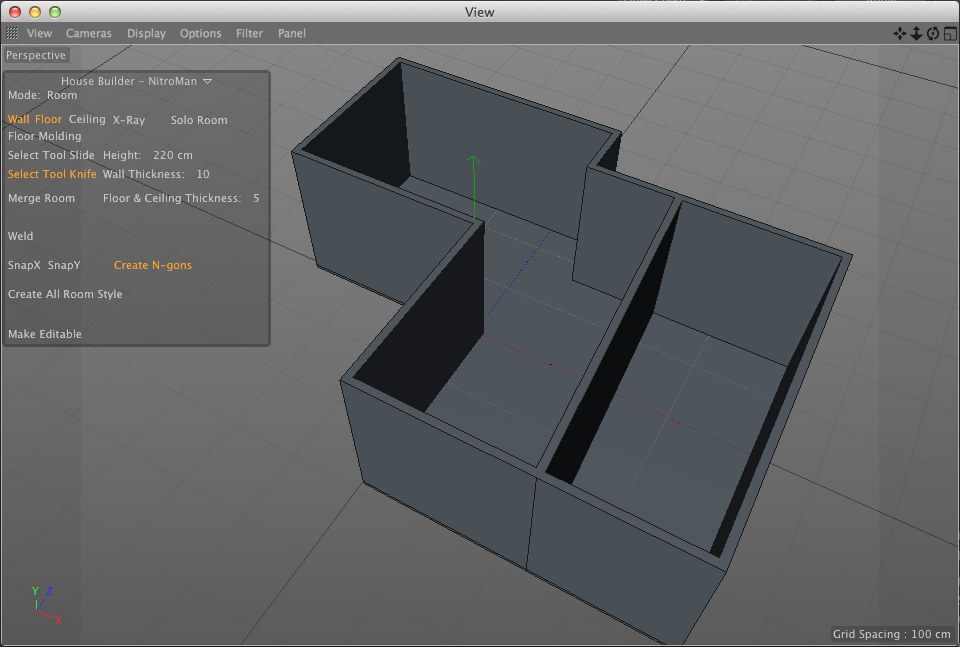
The height and thickness of walls and floors can be defined using the Wall Thickness and Floor & Ceiling Thickness settings. The latter defines the thickness of floors and ceilings together.
To move wall intersections or walls themselves, simply move the corresponding points or edges. To remove entire walls, select the respective polygon edge and click on the Merge Room option.
Moving the floor plan’s walls or polygon edges can also be easily done using the Select Tool Slide option. Selecting this option will make parametric settings available for moving or even cloning edges.
To continue with the construction of our example house, click on Create All Room Style. This will create an Annotation tag for each room of the house. Corresponding Child objects will automatically be created for the House Builder object. If these objects are renamed, their Annotation tags will be updated automatically.
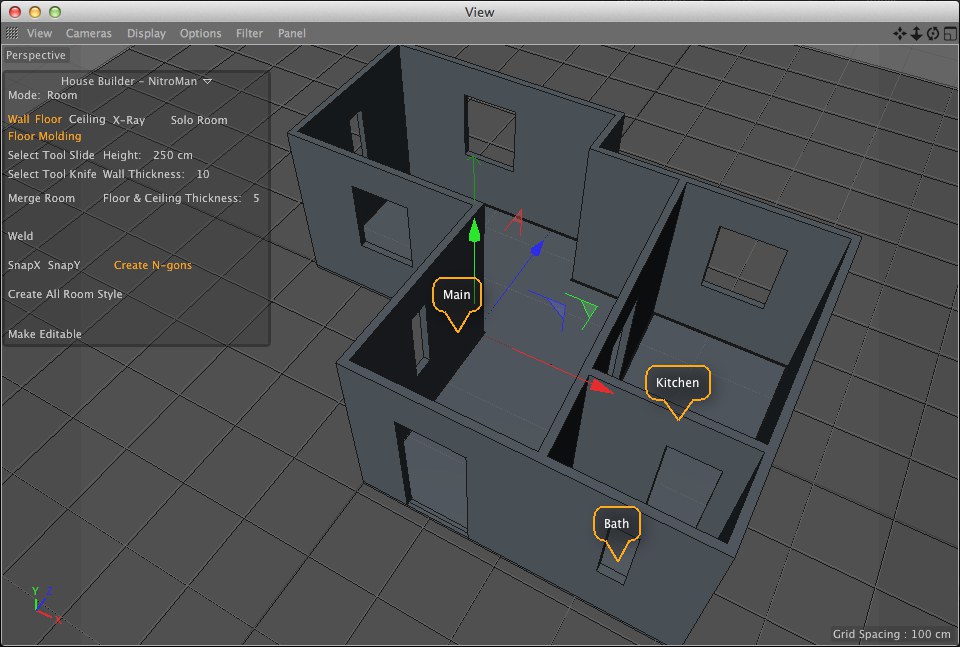
Drawing the floor plan using the PolyPen tool, adding walls using the Select Tool Knife tool and additional modifications can all be done according to a traditional architectural floor plan. Simply load the floor plan as a bitmap file in the Attribute Manager menu’s
Now select a room in the Object Manager and click on Solo Room in the House Builder’s menu. Individual rooms can be displayed individually and detached from the rest of the house.
To create openings for windows and doors, create the correspondingly shaped splines and make them Child objects of the Hole Door & Winobject. An opening will be created accordingly. Spline objects will snap to the nearest wall, which means that you don’t have to worry about proper rotation of the Spline object.
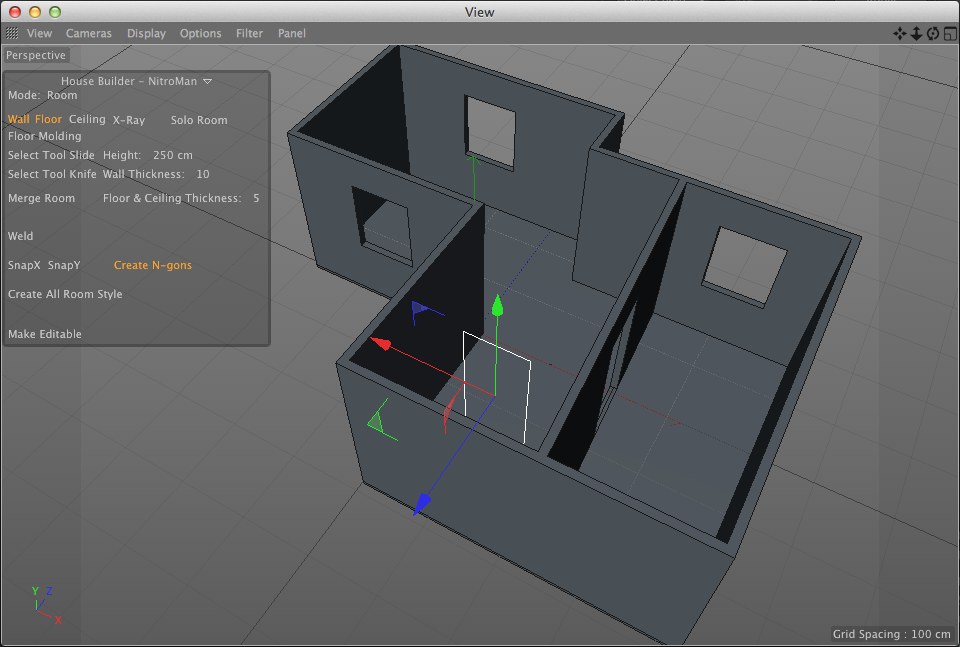
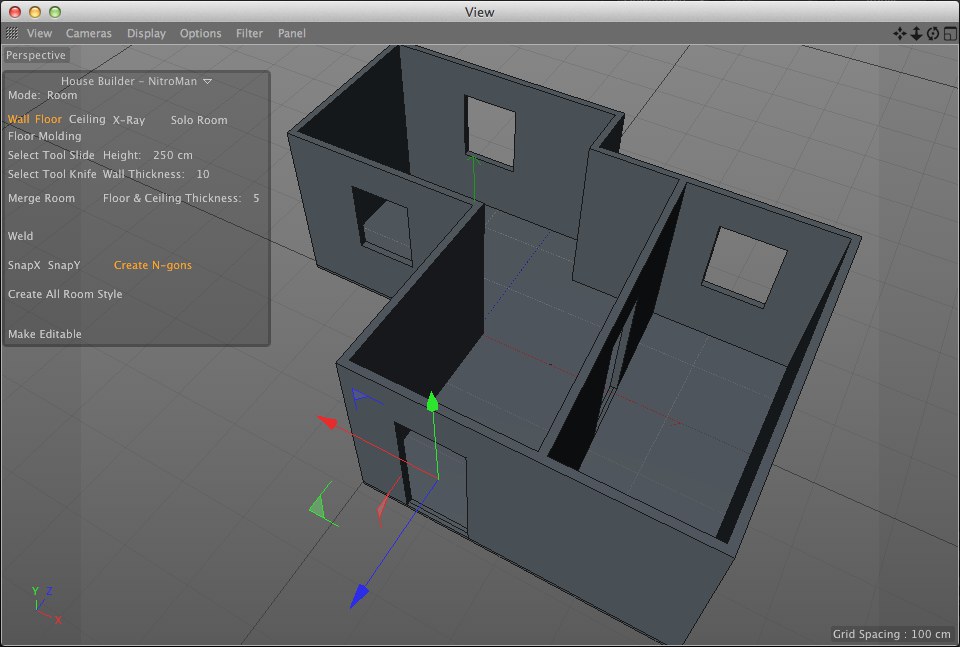
If you are building a house according to actual architectural plans, as described above, you can use the same procedure when adding openings for windows and door.
After the basic shape of the house has been defined, materials can be assigned to the walls and floors. There are three ways in which this can be done:
- Create the materials and assign them to the corresponding room’sobject. To do so, elect the room in the Object Manager and double-click on the material preset in the Content Browser. Wall materials must reference the invisible Wall Inside or WI selection; floor materials must reference the invisible Floor or F selection - assignment will occur automatically with the previously described feature.
- Select one of the room style presets in the Content Browser (Presets / Tools & Helpers / House Builder / Room Styles). Double-click on the desired preset to assign it to the selected room.
- Create your own room style preset by double-clicking on the Custom Style.c4d preset. A simple scene will open with aobject named Your Style in which you can create custom materials. When you’re finished you can create your own library (Content Browser menu:
) into which you can drag your Your Styleobject. You can access your preset for other Projects at any time via the Content Browser.
The Floor Molding option can be used to create floor moldings for your rooms. When a room is selected, the floor molding can be modified in the User Data tab’s menu.
The invisible selections for assigning materials to the room’s floor moldings are named floor molding or fm.
To convert your house into an editable polygon mesh, do not press the c key. Use the Make Editable option (in the House Builder menu). Leave the Create N-gons option enabled to make sure you get a cleaner mesh.
One more tip: After you finish your 3D house design you can add parametric windows (Presets / 3D Objects / Windows Modular) or stairs (Presets / 3D Objects / Staircases Modular).
