XPresso Context Menus
In the XPresso Editor, the context menu provides quick access to commands that are specific to nodes, XGroups and ports. Some of these commands are available from the context menu only. The commands shown vary, depending on whether you access the context menu while the mouse pointer is over a node, XGroup or port.
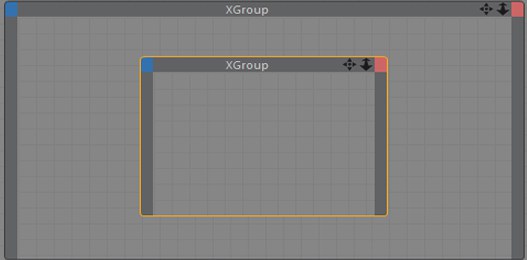
If you access the context menu while the mouse pointer is over an empty space in the XPresso Editor, the commands for XGroups are also shown. This is because the XPresso Editor is filled by the base XGroup, which is created automatically for each new expression. The base XGroup’s title bar is shown just below the XPresso Editor’s menus.
To open a context menu:
Right-click on a node, XGroup, port or empty space in the XPresso Editor.
Context menu for nodes and XGroups
Some of the following commands are available for both nodes and XGroups, while the others are available for nodes only or XGroups only.

This command creates an empty XGroup. To place nodes and other XGroups into the empty XGroup, drag them from the XPresso manager and drop them into the empty XGroup. Alternatively, cut or copy the elements, select the empty XGroup and paste the elements into it.
To create a new node, choose the desired node. Nodes that belong to the Cinema 4D core application are listed in the XPresso sub-menu.
This command is the reverse of Convert To XGroup. The selected XGroup is deleted and its nodes and wires are moved to directly within the XPresso Editor.
This command creates a new XGroup and moves all selected nodes and XGroups, including their wires, into the new XGroup.
The selected nodes and XGroups are aligned to the grid.
Here you can choose from various preset zoom levels.
Use the commands in the View sub-menu to set the windows of the selected nodes and XGroups to a particular size. For example, you can conserve display space in the XPresso Editor by minimizing an XGroup once you are done editing its contents.
Minimized reduces the window to its title bar only; this has the same effect as double-clicking the title bar. Standard returns a minimized or full-screen window to the last size it had when you manually resized it. Extended mode returns the window to its previous size when you last manually resized it. With full-screen, the window is magnified to fit the XPresso Editor window.
If Locked is selected, the contents of the XGroup are hidden and can no longer be edited. The XGroup is scaled to its Standard size. Use Locked when you want to protect the XGroup from accidental changes while you are working on other parts of the expression. To unlock the XGroup, choose Locked once more.
This sub-menu provides access to the same commands as the XPresso Editor’s
Show All zooms the contents to fit the XGroup’s window. Center Nodes centers the contents in the XGroup’s window. Align To Upper Left moves the contents to the top left corner of the XGroup’s window. Align To Grid aligns the contents to the grid of the XGroup’s window.
This command deletes the connections (i.e. wires) of the selected nodes and XGroups.
This command deletes all ports that are not connected to the selected node(s) and/or XGroup(s).
To delete ports individually, choose Delete Ports from the port’s context menu, or double-click each unconnected port that you want to delete.
If this option is enabled, the names of ports are displayed in the selected nodes and XGroups.
This command deletes the selected nodes and XGroups, including their wires.
To rename a node or XGroup, choose this command and enter the new name into the dialog that opens. You can also rename nodes and XGroups using the Attribute Manager.
This command has a different effect depending on whether you select it from a node, an XGroup or the XPresso Editor.
If Optimize is selected from a node’s context menu, the node is scaled to the smallest size at which its name and ports are visible.
If Optimize is selected from an XGroup’s context menu, the XGroup is scaled to the smallest size at which all its nodes and XGroups can be seen.
This command selects the next connected XGroup or node.
Use this option to disable or enable the selected nodes and XGroups. This can be especially useful for testing parts of an expression without having to disconnect wires. (You can also enable and disable nodes and XGroups from the XPresso Editor’s
If you disable a node or XGroup that is between two enabled nodes and/or XGroups, no values will be passed through. In effect, the enabled elements will be disconnected from each other. XPresso elements that cannot be calculated, whether due to disabled elements or incompatible data types, have a yellow title bar.
Using these commands, you can delete ports and wires, rename ports and access the Port Info window.
To open a port’s context menu:
Right-click on the desired port.
This command opens a window containing information about the port, such as its name and data type.
This command deletes all of the port’s wires.
Enter a new name for the port in the dialog that opens. Meaningful names can help to make the expression easier to understand, especially if you are editing an expression you created some time ago and you have forgotten how it works.
The port and its wires are deleted. You can also delete a disconnected port by double-clicking it.