![]() Pivot Object
Pivot Object
Pivot Object
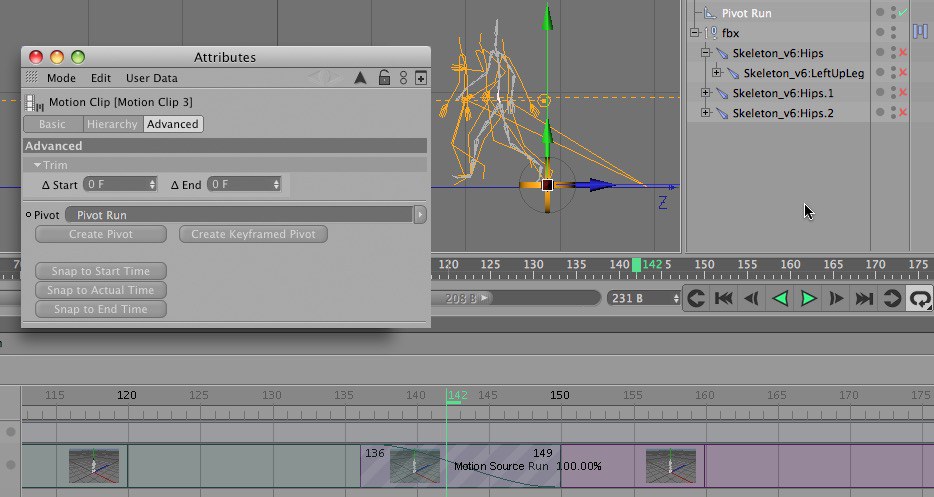
The Pivot Object was especially designed for use with the Motion System to interactively move, scale and rotate an animation within a Motion Clip interactively in the Viewport. To use the Pivot Object it must first be assigned to a Motion Clip. To do so, make sure you are in Motion Mode and activate a Motion Clip in the Timeline. Drag the Pivot Object into the "Pivot" field in the Attribute Manager’s Advanced tab. From this point on you can use the Pivot Object to modify this Clip’s position, scale and rotation. The Pivot Object can be used if, for example, you want to use several different Clips for a single object or hierarchy consecutively without causing a jump in the animation.
Let’s say you have two animations for a single character saved in separate Motion Clips, the first a walk cycle and the second a transition from walking to standing still. You want to use the walk cycle first and let it loop multiple times with the "Loop Relative" option enabled. After the walk cycle you want to apply the second Clip. Of course you will want to create a decent looking transition between these two animations. Naturally the second Clip should start where the first Clip ends, and the load-bearing foot in both animations should be at the same location during the transition. This is exactly what the Pivot Object is for.
If the green check mark next to the Pivot Object in the Object Manager is deactivated, the Pivot Objects coordinates in relation to the Motion Clip can be modified. This way the position of the Pivot Object can be modified (or animated!) even after it has been assigned to a Clip. Once the Pivot Object is re-activated its new position will serve as the Motion Clip’s pivot point.
An Example of How a Clip is Positioned.
It is actually very easy to position a second Clip exactly where you want it. This is done as follows:
- Let’s say the second Clip begins with the left foot being the load-bearing foot. We therefore have to select a point in the first animation at which the character’s left foot is the load-bearing foot, and this will be where the transition takes place.
- If you haven’t already done so, both Clips must be placed on the same layer in the Timeline while in Motion Mode (this can be done by Shift+dragging a layer). Position the second Clip so that it lies clearly behind the first (temporally) and drag the Timeslider to the beginning of the second Clip.
- Switch to the Move Tool and open the Snap settings (press
P in the Viewport) and enable Axis Snap. - Now move the Pivot Object so that it matches the position of the left foot’s base Joint Object. Activate the Pivot Object.
- Drag the Timeslider to the location in the first Clip at which the character’s left foot is the load-bearing foot. Position the Pivot Object until it matches the position of the same Joint (whose location is defined by the first Clip). Don’t forget to disable snapping when you are done. Otherwise it can lead to unwanted effects.
- In the Timeline, position the second Clip within the first Clip so that the beginning of the second Clip lies exactly at the previously ascertained location. Test the animation. The transition can subsequently be adjusted and refined using the transition settings.
