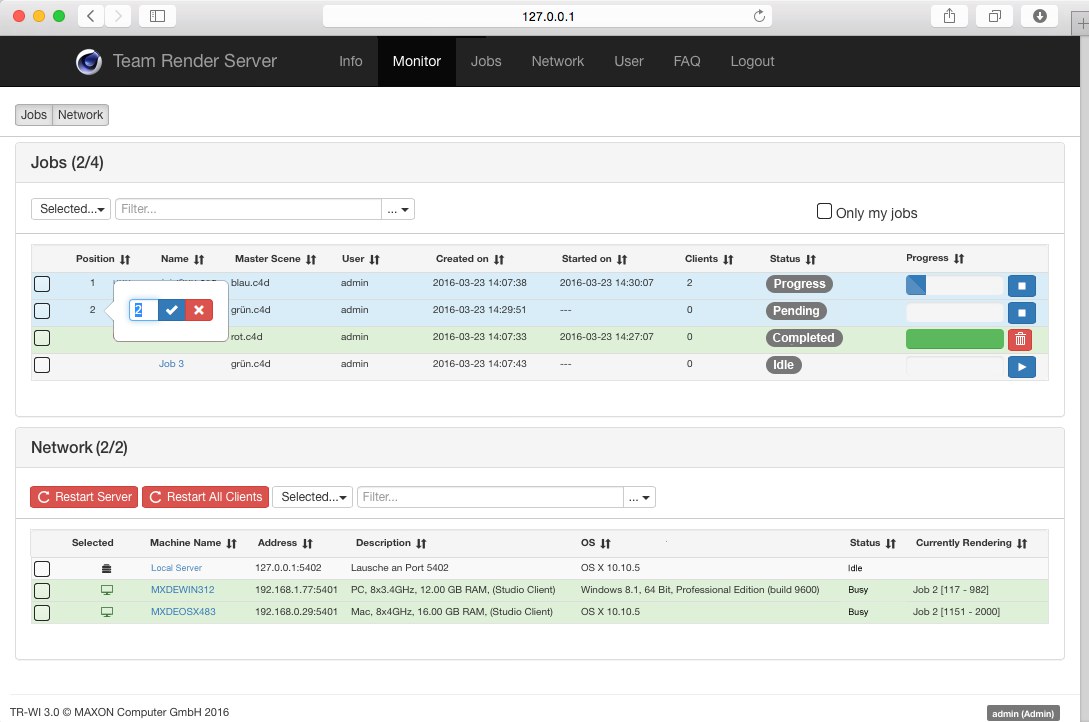
Monitor Page
Let’s say you have 27 render jobs in your pipeline. This can be somewhat difficult to track, which is why the Monitor page offers a list of all jobs and all available computers:

The buttons at the top left can be used to hide or display the Jobs and Network (=all existing clients) lists.
Below the buttons you will see the number of jobs listed as well as the jobs that have been started.
Under Jobs you will initially see a selection menu with the commands previously described here.
Both filters on this page are display filters only (hidden jobs or computers will still be active) that work in real-time. To activate the filter, simply type a search term into the field. Each job/computer whose name contains at least part of the term entered will be shown. Upper and lowercase will be ignored. Click on the X button on the right to clear the search bar and disable the filter function.
At the right of the filter field you will find a selection menu from which you can choose in which column the filter should search. If the default setting is used, the filter will search in all columns.
The Only my jobs option at the right of the Filter will only be displayed if you are logged in as an administrator. Enable this option if you only want your onw jobs listed.
The first half of the interface is occupied by the jobs list:
The information provided here essentially reflects the information provided on the Jobs page. You can click on the column names to arrange the items alphabetically, by number or by status, etc.
Jobs will be colored according to their status:
- Blue: Currently rendering.
- Green: Render completed.
- Red: Render failed.
- Yellow: Job stopped.
At the right are buttons that let you start, stop or delete jobs.
If jobs are displayed with a position number in the first column you can click on the number and enter a different existing position in the dialog window that opens (click on the check mark (or
The network section of the monitoring page will have the title Network (x/y) (in the example image Network (2/2), for example, whereby "x/x" represents the number of known clients or clients currently rendering.
Below this you will see a series of commands and filters that are described here.
The registered and verified Render Clients with computer name, operating system and current render job are shown. Click on the column name to switch the list from alphabetical to numerical order and vice-versa. Click several times to set sorting to ascending or descending order or according to date of creation.
The selection check boxes at the left show which Render Clients are active in the Team Render Server. This status cannot be changed in the browser interface. The computer names can be clicked upon to display them on the network list.