X-Particles and Cycles 4D: Rendering Fire
This brief tutorial consists of three pages:
- Rendering Smoke
- Rendering Fire
- Combining Smoke and Fire
Rendering fire in Cycles 4D is, if anything, even easier than smoke. For a test scene we will use the same one as used in the rendering smoke page, with some small adjustments to the xpDomain and the xpGaseous objects.
When rendering smoke, the aim is to scatter and absorb light, but fire emits light. Therefore, the Emission shader is used, rather than the volume nodes. To render fire, we only need to provide two things to the emission node: the strength of emission and the colour of the fire.
We can get these from the Point Density node, and in fact the same node used for rendering smoke can be used to render fire as well. You don't have to do this: if you want to use different parameters in the point density node for fire as opposed to smoke, just use two such nodes. But to keep it simple we will use one node here.
Obtaining the data
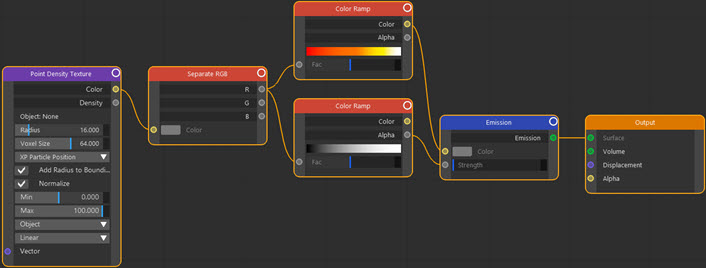
As before, the data we need will come from the domain object but whereas the smoke density was output in the Density port, the fire value is output in the Color port. In fact, this port outputs three pieces of data, but we only need the fire value, which is output in the red component of the Color value. To get this value we use a Separate RGB node, which does exactly that: separates the Color value into its three components.
Initially then the node tree looks like this:
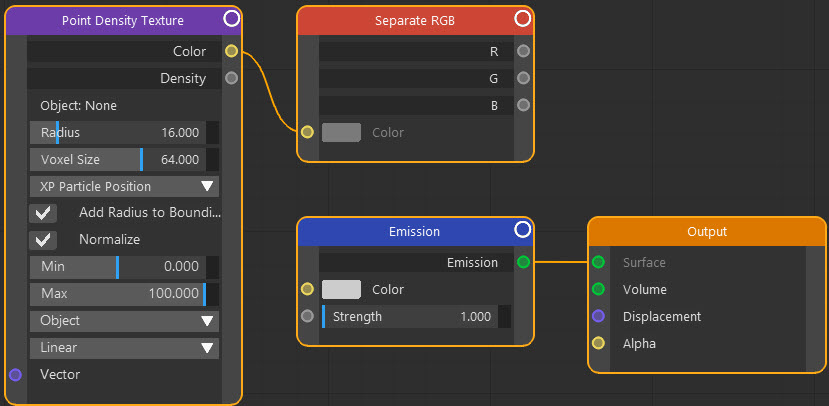
At the moment this doesn't do anything, other than give us access to the fire (and fuel and temperature) value from the domain. Note that this will be in the range 0 to 100 from the domain (those values are set, and can be changed, there) and will be normalized into a range of 0 to 1 because the Normalize switch is checked and the Min/Max values match those from the domain.
We can easily set the emission strength by connecting the R (for Red) output from the Separate RGB node into the Strength input of the Emission node. But how do we get a colour?
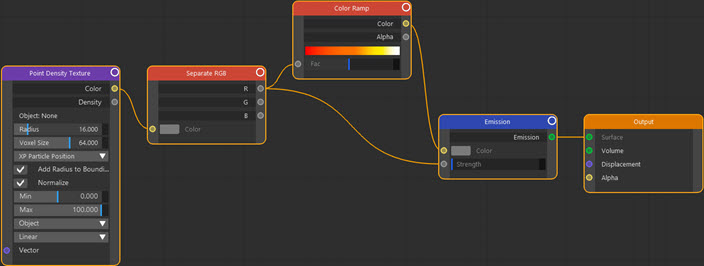
Colouring the fire
For this we need a Color Ramp with a suitable range of colours. In fact, you can use any colours you like so if you want a magical green fire, you can do that. All we do then is connect up the R output to the Color Ramp's Fac input and the fire value from the domain will select the colour to use from the gradient. So now we have this:
Click to enlarge image
If we render a frame using this material, we might see this:
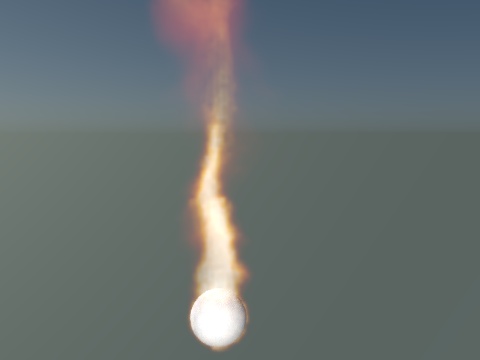
Perhaps this looks a little pale and we'd like a more intense fire? That's easy to solve. All we need to do is increase the value sent to the Strength input of the Emission node. We can do that with a Math Multiply node; in this case, we used this to multiply the emission strength by 2:
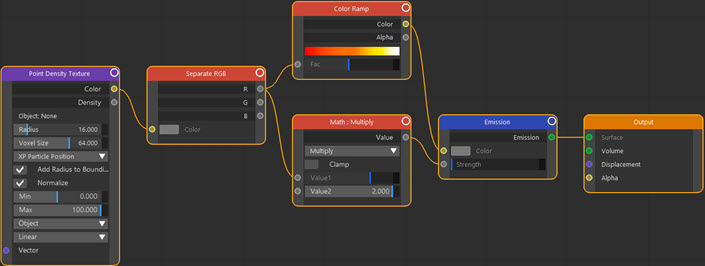
Click to enlarge image
The same frame when rendered looks like this:
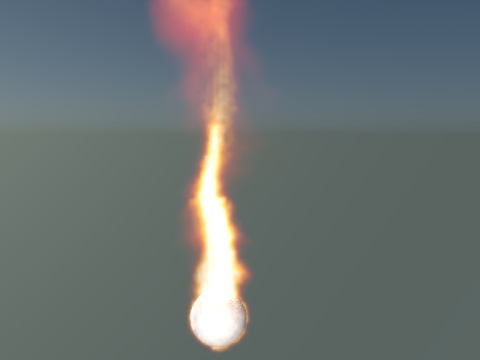
This looks a lot fiercer, perhaps even too much so. The final animation with the multiply value set to 1.5 is this:
Manipulating the Strength value
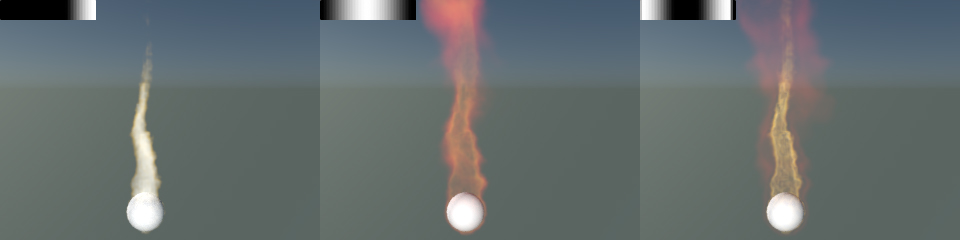
You can do other things as well: for example, you could pipe the R value into a Color Ramp then pipe the output of that into the Strength port of the Emission node. In this case the Color Ramp is being used as a way to adjust the strength, not the colour:
Click to enlarge image
As shown above the use of the Color Ramp won't make any difference but with different gradients you can get some interesting effects, shown here with the gradients that produced them:
The effect of the Max and Min values in the Point Density node
It may not be completely clear what the effect of changing these parameters is. For this example, assume that the fire value obtained from the domain always ranges from 0 to 100. If the Min/Max values in the node are also 0 and 100 the fire value output will be between 0 and 1.
But if we change the Max value to 50, what happens? All the fire values from the domain which are 50 or more will be output as 1 from the node, making the fire brighter and shifted to the right-hand end of the colour gradient. If the Max value is set to 200, the maximum value output from the node will never be more than 0.5, so the fire will be duller and colours shifted to the left of the gradient. You can see the results here:
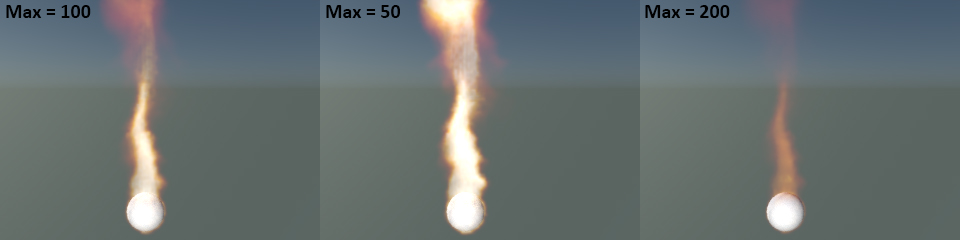
You can see that altering the range of values in the domain, or in the Point Density node, have a major effect on the rendered result.
Smoke with fire
We'd probably like some smoke with our fire. Combining the smoke and fire is dealt with in the final page of this tutorial.


